|
Update: The Microchip PICKit2 programmer with V2.61 application software will calculate and reprogram an erased OSCCAL in a single operation. Therefore I would now recommend you get a PICkit2 programmer and then you'll never need to worry about the OSCCAL word getting erased ever again. If you have lost or erased the OSCCAL setting and you don't have a PICkit2 programmer available follow this link to the OSCCAL Recalibration project This will allow you to calculate the correct value to program back into the PIC. The PIC 12F629 and 12F675 have a factory set oscillator calibration value written to the last program memory location during manufacture. When programming the PIC the programmer software should read this value out, merge it with the program data being written to the PIC, and then write it back. However, since this calibration value is in the normal program memory area of the PIC it is quite possible to erase it. Once you've done this, working out what the value should be is not easy and without it the internal 4Mhz oscillator will not run at the correct frequency. Worse still, any application code that expects to find the calibration value will most likely crash. Therefore it is important to know the correct value for the internal oscillator calibration setting. This tip shows you how to make sure you always know what the correct oscillator calibration value is so you can recover it and write it back should you accidentally erase it.
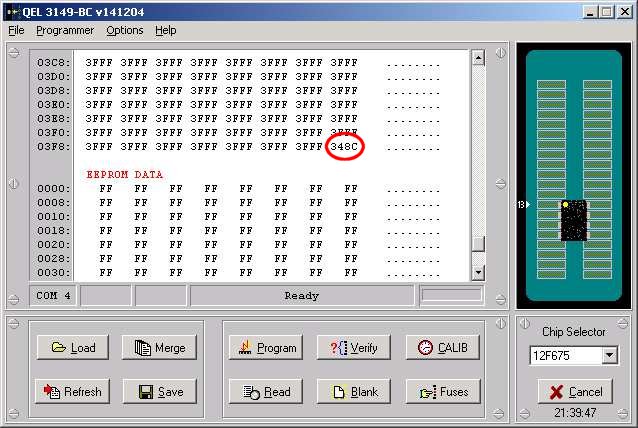
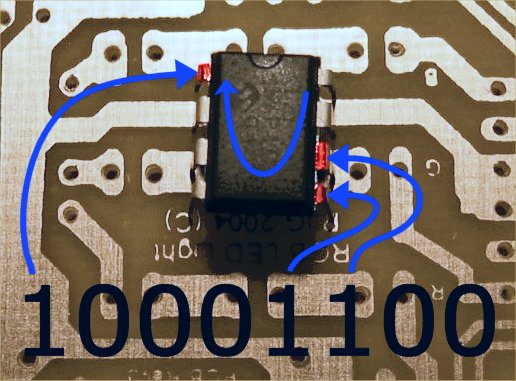
Now if you ever erase the
calibration value, all you have to do is take the binary value marked on
the pins, prefix it with 34 and write it back to address 0x3FF - Easy! |